Tuesday, November 23, 2010

Table Numbers?

So I struggled and struggled over table numbers. Originally we wanted to do photos of us at each age. Finding cute pictures for each age; however, proved problematic. I couldn't find any photos of me at age 2 and Wayne was apparently non-existent from ages 5-8. Alas.

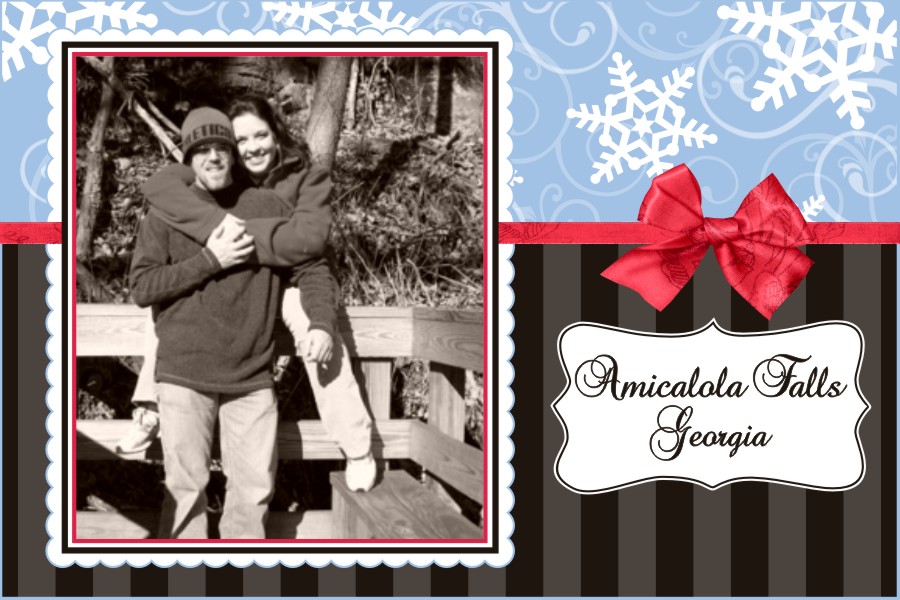
Ultimately we decided to do table names instead, naming each table after our favorite places. We then added pictures of us at that place and voila! cute table names. Luckily we only have 7 tables. It would be difficult to use names if you have a really large wedding because folks might get frustrated trying to locate their table in a huge sea of options.

I have most of our photos uploaded to Walgreens.com, so I went on their website to review pictures and get ideas for place names. While there, I stumbled on their photo holiday cards and took my inspiration from them. I used a little digital scrapbooking magic and added our photos and I'm very pleased with the results!

Not traditional? So what else is new? It's a little fun and different and I'd like to think that describes us a couple, too. Perfect! If anyone reading this happens to be coming to the wedding, can you guess what table you'll be visiting?

Saturday, November 20, 2010

Our Shower

So the wonderful people at work generously threw us a wedding shower, and it was a blast! In addition to a TON of delicious food, we were entertained by a rousing game of bridal pictionary, the newlywed game, and even wedding trivia (in which I disappointingly placed 2nd- darn you, Peg!)

Our gift was an amazing pair of binoculars that far surpassed the pair we had on our registry. It was such a warm and wonderful gesture and we were so touched by the outpouring of support from the Ijams team!

Wednesday, November 3, 2010

Flower Girl Gift

We struggled with fun ideas for gifts for our flower girl and junior groomsman. They are 6 and 10, respectively and I just wasn't thrilled with any of the gift ideas that I found online.

After some discussion, we ultimately decided to get them personalized totes, filled with fun little presents that fit each of their personalities (Barbie and princess for her and Star Wars for him). I did some searches for personalized totes and they are expensive! And typically the only personalization is names and/or initials. Then I took a trip to JoAnn Fabric and Crafts...

Cue sunlight through parting clouds and a heavenly choir-of-angels-ish sound. I found cute tote bags that were a complete bargain at $3.99 each. I got a white tote with pink trim for Caroline and a blue tote for Carson. To personalize them, I purchased iron-on sheets designed for dark fabrics. They are pretty genius because you don't have to create the design in mirror image for printing.

A few minutes with some graphics software and a couple minutes in the ink jet printer and voila! personalized totes for less than $6 each!

I matched the pink of the handles and trim with my handy-dandy Pantone swatches, just to nerd up the project. It worked well; however, and gave the final product a professional look (if I do say so myself...)It's uber-girly and filled with Barbie and princess goodies like make-up, stickers, and craft supplies. And I found a cute Flower Girl teddy bear from Oriental Trading to top it all off.

Tuesday, October 26, 2010

Label love

I know... I get it... Address labels are supposed to be handwritten. It's in all the etiquette books. It's everywhere online. It shows that I'm a good hostess, right? And that I pay special attention to the details. It's warm and personal. But? No buts, that's the end of it. But, wouldn't it look charming and lovely to use a delightful font and print it on clear labels that basically disappear, giving the illusion of hand calligraphy? Nope. No dice. Old school here.

I can't; however, rationalize shelling out oodles of money for a professional calligrapher and I haven't used a calligraphy pen since middle school. My handwriting is so-so, but I wanted something a little more special than just an address on a lovely white pearly envelope. Enter Martha Stewart, goddess of all "good things" and weddings. I found her version of address labels here. And although she says that it's an appropriate option, I was still yearning for old school handwriting.

So I modified her idea so that the address block allowed space for my own handwriting. I found a high quality black pen and got to work. The other advantage was that I could print the labels on my ink jet. If I messed up, it was a simple matter of printing a few extras. A MUCH more cost effective solution than purchasing extra, expensive white pearly envelopes.

The labels wrap around and have the return address printed in the same font that I used on the Save the Dates and the actual invitations. A nice compromise, right? Oh, and how cute are my personalized Zazzle stamps?

Friday, October 22, 2010

You're Invited!

Please note that if you would like to be surprised my the arrival of my invites- STOP READING NOW!


SERIOUSLY, STOP READING IF YOU WANT TO BE SURPRISED. I MEAN IT.


ARE YOU SURE? IF YOU'RE STILL READING THIS IT MUST MEAN THAT YOU WANT A SNEAK PEEK AT THE INVITES.


SO HERE THEY ARE. WITHOUT FURTHER ADO...


WELL MAYBE A LITTLE ADO...


My invites! Ta Da!


After many slight (and not so slight) snafus. Snafu #67: Exploding glue all over the living room. But they're done. They're lovely. And they're on their way!

Monday, October 18, 2010

Oh, the Cuteness (a.k.a. "A Story of Escort Cards")

In earlier posts, I lamented my inability to make a decision about escort cards. I knew I wanted them, in fact felt strongly that I needed to have them. I even found a lot of designs that I liked. Maybe even a few that I loved. But I couldn't land on a final design. I got momentarily inspired and excited by a new-found design, only to quickly lose steam once it came time to actually design them.

And then, while searching wedding favor stores for completely unrelated items, I found my solution. The skies parted, sun shone through and a choir of angels heralded the arrival of a perfect solution! OK, admittedly, that's a smidge dramatic, but I think I made my point. It was a solution so lovely, so perfect, so "me" that I ordered them immediately. I can now introduce you to my escort cards:

While I fully intend to redesign the basic card, the idea of the plantable paper snowflake and the use of a gardening pun simply warmed my heart. Who doesn't love a well-placed pun? It may not be the most creative solution, or even the most elegant, but it's very much in tune with my "green" sensibilities and adds a charming touch of spring to our winter festivities!

Monday, October 11, 2010

DIY Boutonnières

If you've read my earlier post, you already know my desire to try my hand at DIY boutonnieres. Admittedly, I started slow. I wasn't sure where to begin the structure of the mini floral arrangement. I could have searched for one of the thousands of articles online, but my computer was in the other room, and I was feeling stubborn. It's just silk flowers and floral wire, for crying out loud!

After a little trial and error, I actually put together a boutonnière that I'm sort of in love with! It has the right blend of earth tones and reds, and even has a little sparkle. I even used some of the same floral elements that Mom and I used in the centerpieces and pomanders. I must say, if I can toot my own horn a little bit, I'm very pleased with the results.

Although it took me MUCH longer than expected (Don't all DIY projects seem to do that?), It actually saved me a good bit of money. Had I ordered them from one of my favorite vendors on Etsy, it probably would have cost me about $75, which is quite reasonable, don't get me wrong. With all my supplies, I think all six will cost me about $30. Plus, I have the satisfaction of having done them myself and I'm proud of that!

I definitely won't be quitting my day job, largely because I'd have to charge about $60 per boutonnière to account for my time! Would you consider DIY boutonnières?

Wednesday, October 6, 2010

Dinner Decor

Well, I have pretty much spent over 40 blog posts talking about the wedding. Guess what, there is an event that happens even earlier on the calendar that I don't want to neglect... the rehearsal dinner!

Wayne and I are largely handling the dinner ourselves. We've booked the room in the restaurant of our choice (Bare Bones on Hernando Beach), and I'll be handling the rehearsal dinner decor. I wanted to stay with the same color scheme as the wedding, and keep the snowflake, cardinal, and branch motif. For the dinner; however, I wanted to go a little more rustic. More of a log cabin feel. The wedding is all about bling; I wanted the rehearsal dinner to be a little more casual.

I got my main inspiration from this lovely design by another bride blogger:

I love the pine cones, bird nests, and candles. Of course, the colors are all wrong, but that's easily remedied. Instead of copper, our metal of choice is silver, so that can be changed, too. I was so excited to find these wonderful candles from an Etsy vendor (Twigs and Blossoms):

They were a bit pricey; however, and it was a bit outside my budget to purchase enough for all the tables at the dinner. Then I found these:

Plain birch candles... AND they were very affordable. The plain ones (purchased from another Etsy vendor) cost me less than $25 for 8! Much more affordable than the first version. To add to my enthusiasm, I remembered that we have a wood-burning set at work. How hard can it be to draw some snowflakes?

As it turns out, it's not that hard. A bit time-consuming to be sure, but not hard at all. I'm actually quite thrilled with the results. I also plan to collect some pine cones, perhaps add a little sparkle to them, and some silver candles to complete the tablescape, but you'll have to stay tuned for more details about that!

Friday, October 1, 2010

DIY Guestbook

So, in an earlier post, I described our wish tree, which will be a lovely addition to our gift table. At the time, I hinted (OK, outright told you about) a DIY guestbook that would allow for a little more creativity for our guests.

There is a wonderful online vendor called the Guestbook Store, which offers great alternatives to traditional guestbooks. While I love their designs, I didn't love the prices... plus, I wanted to use our names instead of the generic "bride and groom." So, I thought to myself, "hey, I can do that," which is almost always what I think to myself when I conjure up new diy projects. I'm about 60% right when I say that to myself. This time; however, I was indeed right. I CAN do that.

So I took inspiration from designs from the Guestbook Store, and got a little more inspiration from clever brides on Weddingbee, and voila! DIY Guestbook pages! I customized them with fun questions about us, and the ubiquitous bird, branch, and snowflake designs and I'm so happy with the results.

Front:
Back:
I plan to place pages on each table at the reception with a note, encouraging guests to fill them out. At the end of the reception, I plan to have members of the wedding party gather up the completed pages for safe-keeping.

I sized them to be 8" X 8" so that they will fit perfectly in scrapbook page protectors. I think it will be a fun addition to the collection of photo albums and scrapbooks about our wedding!

Tuesday, September 28, 2010

Extra! Extra!

Read all about it! I love a reason to make a newsletter, and what's more news-worthy than a wedding! To keep guests informed, even before the invitations go out, I created a wedding newsletter. It contains a little behind-the-scenes information about the wedding, travel arrangements, accommodations, and information about the area. I also included a little section on weather and what to wear, which seems to always be in question for wedding guests.

I also directed guests to our wedding website and this blog. Is it weird to write a blog post about a newsletter that talks about a blog post? Oh well, circular logic aside, Enjoy!

Saturday, September 18, 2010

Make a Wish (Tree)!

OK, so I was torn between two guest book ideas. I loved the idea of the wish tree because it is beautiful and it is a Scandinavian wedding tradition, a nod to my Norwegian roots. I found a beautiful photograph in a Weddingstar catalog, featuring a manzanita branch with tissue paper blossoms. I also loved the idea from Martha Stewart Weddings, which provides guests with sentence starters like "Love is..." and "We wish you..."

I decided to combine them into a wish tree, with cards that guests can select to finish and hang on the tree. There will be 3 sentence starters: "We wish you," "Love is," and "Once upon a time."


Guests can complete the cards and then hang them on the branch. I also designed a corresponding sign to place next to the tray.

I even found a beautiful silver tray and silver snowflake pens for the wish tree.

I think this idea will be a beautiful addition to the decor of the reception. What it doesn't do; however, is really provide guests a chance to write more personalized messages. As a result, I've created fun guestbook pages that will be placed on each of the tables at the reception. They are a fun combination of conversation starters and a guestbook. The pages will be sized 8" X 8" so that I can slide them into scrapbook page protectors after the wedding. You'll have to wait for a later post to see those... A girl has to have a sense of mystery after all!

Wednesday, September 8, 2010

These "Bouts" Are Made For Walkin'

Down the aisle, that is...

I've been searching for fun and creative boutonnière ideas for our December wedding. It was one of those items that I knew we'd have to do, but didn't really get excited about. That is, until ETSY changed my mind. Now I'm so excited about another diy project that I can hardly contain myself. I had never dared imagine anything other than a rose, a leaf, and some baby's breath. Silly me! Look at all the fabulous items from ETSY vendors (Erica Cavanagh, Kate Said Yes, Emily K Botanic Studio, and Boutique In Bloom:

I love the idea of incorporating organic elements like small pine cones and feathers, with silk elements like faux berries and pearls.

I think I'm probably going to tackle this project myself, along with some ETSY inspiration. I definitely want to create something unique and one-of-a-kind for the fellas!

Tuesday, September 7, 2010

Ribbon Wand-erful!

I was stuck on the idea of wedding flags. Having people waving fun congratulatory words like "yay" and "congrats" and "hooray" just seemed like so much fun. While I've seen some pictures of flags and completed projects, I've never actually seen a photo of them in action, which gave me pause. Hmmmmm...

I knew I didn't want bird seed and I wasn't sold on bubbles, but I did want to provide folks with something for guests to do that would herald our new status as husband and wife. Then I found ribbon wands, and I fell in love. I mean, how fun will it be to skip back up the aisle, surrounded by a sea of waving ribbons? Never seen them in action? Take a look:

They seem so joyous and celebratory. That's exactly the feeling I would like to invoke at our ceremony. I ordered almost 60 white dowel rods from a craft vendor on Bonanzle for less than $7. I'm planning to purchase red satin ribbon from Nashville Wraps, which is approximately $6, so the whole project will cost less than $15... totally in the budget!

Wednesday, September 1, 2010

Bridesmaid Survival Kits


I've been so inspired by other brides' projects that I've found on the web, especially bridesmaid survival kits. I hadn't really considered these before I saw them on other blogs, but after seeing all the great ideas, I had to come up with my own.

So, after a very productive trip to the dollar store, I now have 3 survival kits:

Final list of supplies:
Body spray
Deodorant
Mouthwash
Tums
Tylenol
Breath mints
Shout wipes
Lip gloss
Lint roller
Sewing kit
First aid kit
Manicure kit
Tissues
Cotton swabs
La Fresh wipes (nail polish remover, deodorant, makeup remover, hand sanitizer)

All of these handy items were enclosed in a little makeup kit that I also found at the dollar store.

I used the same design elements on the tag, but I changed the colors to match the case. I also incorporated the mint green that is on the Bridesmaid tote bags that I purchased each girl (Oriental Trading). Once it gets closer, I'll add a little pack of Hershey's Kisses.

The back of the tag has the following poem:

This Survival Kit was made just to say,
I'm thrilled you're beside me on my wedding day!
There's chocolate to give you that sugar high,
And a packet of tissues in case you should cry.
Lip gloss to help you care for your smile,
If a nail should break, I've included a file.
There is Shout if you should spill on your dress,
And mouthwash to keep your breath minty fresh.
There's Tylenol and Tums if it's ill that you feel,
And Band-aids to help you tackle high heels.
I've put everything in this handy pack,
So you'll know that this bride has got your back!
This kit was created so that you can see,
How much you mean to the bride-to-be.

I know that some folks think these little extras are unnecessary, but I think it's a sweet little gesture. Plus, I'll know that my girls will be ready to spring into action at any sign of trouble! :)

Tuesday, August 24, 2010

Flowers!

So, it's time to start thinking about bouquets. I'm really excited about it. We're using silk flowers for centerpieces and aisle decor, so the bouquets will be one of the few places we're using live blooms. As a result, I feel obligated to put a lot of thought into it, since they'll be representing all their Oxygen-producing, photosynthesizing brethren.

Here's what I know:
I want a mix of red and white flowers.
I want to add some organic elements like berries and fiddleheads.
I want the bridesmaid bouquets to just be smaller versions of mine.
I want tulips and lily of the valley to represent my Scandinavian heritage.

Since we're getting married in Florida, the growing season is much longer, so I know I'll have a wide variety of flowers available to me. I'm not too much of a traditional rose kinda gal, so I'm leaning toward what I consider more interesting options, such as:

Anemones and Tulips:

Peonies and Ranunculus:

Gardenia and Lisianthus:

Lily of the Valley and Stephanotis:

Hypericum Berries, Fern Fiddleheads, and Dusty Miller:

These are the bouquets that I'm using as my inspiration:


We'll probably incorporate some real versions of the silk cousins featured in our pomanders and centerpieces, just to make sure everything is cohesive. Did you do real or silk flowers for your ceremony and reception?

Wednesday, August 18, 2010

Can I Offer You a Drink?

Of water, of course! What OOT bag would be complete without a couple bottles of water? But plain ol' bottled water without custom labels? Not on my watch! I knew that I wanted to add cute custom labels to my bottles, and debated doing them myself. After some thought, however, I decided that I need to bring in professional reinforcements on this one. Our hotel has fridges in each room, so I figure that folks might toss their bottles in there. Once the condensation starts, I knew that my little inkjet labels would melt, slide, and run into a drippy mess.

I looked at several sites that print custom labels and most of them had some pretty decent pre-designed templates. Because I have such a specific design concept, however, I really wanted to find a company that would print completely custom designs. I decided to use a company called Bottle Your Brand.

I opted to have the company apply my labels to the bottles and send the whole shebang at once. In hindsight, I should have just ordered the labels, because my order (bottles + labels) was approximately $30 before shipping. Just ordering the labels would have been under $10. With added weight of the water bottles, shipping was also more expensive, so note to self: Duh, just order the labels and spend the 20 minutes adhering them yourself, ding dong.

But, I will say, I'm very happy with the results. The labels turned out great and the cute little 8 oz. bottles will fit perfectly in our gable boxes.

I loved being able to create custom designs that corresponded perfectly with my other DIY projects... all the way down to the right font and cute little red lovebirds.

Monday, August 16, 2010

Dessert Buffet Favor Bags... Almost Done!

In my previous post, I lamented the ink depletion that brought the DIY factory to a halt this week end. Case in point? My dessert buffet favor bags. I set my printer to complete 5 pages of these little babies and then left it alone and went back into the living room to get started on another project. After all, printing high-quality on photo paper takes a long time on an ink jet printer.

After about 20 minutes, I went back to check on them... only to find 1 usable page out of 5. I had completely emptied the yellow ink cartridge and the last 4 pages were a strange dark violet color instead of brown. After a moment of brow-furrowing frustration, I tossed the unusable pages in the recycling bin and got to work on the 12 I was actually going to be able to finish.

We had already selected half-pint tin tie bags for use with the dessert buffet. I am planning on enough candy/cookies to look cool, which will be waaayyy more than the 50 of us can eat in 4 hours! I plan to have the bags as favors that folks can take with them for the road.

To decorate them, I created round labels that coordinated with the rest of my DIY projects. I printed them on photo paper to give them a glossy, professional finish.


Then I used my 2.5" paper punch from EK Success to punch out each of the labels.


I used a 3.0" scalloped circle paper punch to punch scalloped circles out of red card stock.


I adhered the round labels to the scalloped circle and then adhered the scalloped circle to the tin tie bags.


Although red card stock that I ordered is a little darker than I would have liked, I don't think anyone but me is going to notice. I'm very happy with how they turned out and I think the bags will look cute on the dessert buffet table. So, although the project is not quite done, I'm tentatively checking this one off the list!